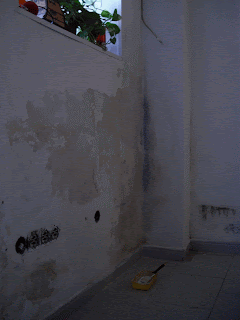
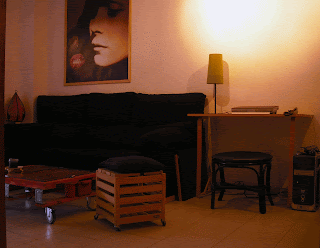
A narrow room full of doors and little light, in need of storaging space, furniture, colour... all to be kept under a tight budget. Challenging indeed, but a delight when the owner says she likes my 'style' and lets me make the design of the looks at will. Now, that's what a call a GREAT way to start the year!
So on I went, and after measuring it came the planning & checking with the requestress; and then the action! part started.
Along with the surprises. Once the record boxes that were piling up underneath the 'window' were removed, we discovered that the wall was seriously damaged with humidity and mold. Uh oh.. it had to be treated and repainted before continuing with the decoration, and so it was. Here the plan was to hang a simple shelf, to add a resting surface next to the couch. Well, it turned out not to be so simple, as apart from the humidity that wall has been 'touched' many times and has wires tucked inside in the most weird places (not to mention the state of the sockets.. such a Spanish wall! ehrm), so I didn't dare drilling holes in most of its surface and had to device a leg and other strenghten items to support the shelf. Finally it is quite sturdy all alongl its almost a meter and a half length. Phew.
Also on this area I hanged the lantern you can see at the end of the wall in the first picture. Over there it was 'lonely', here it gets framed by the door and window to the kitchen and its lines get enhanced. No need to buy a hook, the wooden courtain rod holder I found getting dusty inside the owner's tool box seems perfect for this new task!
Getting rid of all the junk that was clogging the opening on the wall meant clearing up the main source of natural light to the room. But the plant is lovely and could perfectly stay, framing the gap with the help of some wire. Simple but effective.
The poster you see in the first 'before' picture is a great printed picture the owner of the flat took in Dali's Museum. Just hanging with some pins it was getting damaged, but there was not enough budget to buy a massive frame, so I customized one with wooden laths.
For this area I made a couple of custom pieces of furniture: the tv bench to be placed in front of the sofa, and the stool with storage. The red pallet table was one of my first creations, and the owner of the flat one of my first customers! (see the posts with details here, here and here). Then, she also needed a small desk table. I kept it simple and as visually light as possible, using nice sturdy pine wood boards and 'nordic style' curved legs. Placing there a table lamp with a green screen she already had creates a very warm cozy space..
The other end of the room was to be dedicated to the 'Djing Area'. First thing was to paint that end wall red, to cheaply (and strikingly!) 'dress' up the room. It also creates a continuity with the kitchen, that it has cabinets of the same colour.
 A mirror hanging there reflects the light that gets through the opening on the wall and multiplies it. I also replaced the boring, cold and too brigth spot lights with three lines hanging from the ceiling and covered with colourful twine shades from Thailand. The big one in the corner is the plastic cover of a street lamp the owner found a long time ago -really nice.
*For the post with full details on the Dj Deck Stand go here.
There are still some more decoration bits left that I suggest to add: a couple of green cushions on the couch, a green carpet and a few more nice pictures hanging on the walls; but the main job is done, and it makes a massive improvement in terms of gaining space, light and 'cozyness'... all without spending lots of money!
So all and all, I will say it again: this project has been a GREAT way to star the year!


No comments:
Post a Comment