
It all started with a new rearrangement of the inside storage and working areas, plus building up a counter
Now I have fixed the walls and painted the floor white... next it will be the shop front. I can't wait, I already have an idea on how it will look and what to do, but I have to wait for that and carry on with the everyday work. Little by little, step by step, anything can be accomplished!
Here are a few shots of the workshop after the last renovation- it has already changed, of course. Some things go, and new ones are added almost constantly... I like that.


THE NEW BUSSINESS CARDS...

Finally, I made 'proper' cards! I wanted to stick to the idea of handmade ones, stamping pre-cut pieces of rough, recycled cardboard, preferably orange-y toned. Ha! don't ask me why, but Spain has a HUGE lack of stationery supplies, the choice of paper is extremely limited and pre-cut blank bussiness cards are simply NOT available: I hate it when shop keepers say "that doesn't exist" grunt.
So, when by pure chance I came across a stack of leftovers at a tiny local print shop, even if the texture was too 'nice' and the colour too neutral I took them all, made the design according to their slightly wider shape, and ordered the stamp at once! They're ok, considering, me thinks.

... & THE BUSSINESS CARD HOLDER

This handy bellboy chap has been around my place for quite a while, got it a long time ago in a poorly condition and restored it, kind of already thinking that he would become useful at some point.
Before I made the new cards he was just holding a black square tray, with the tiny pieces of cardboard scattered on top. I could see people struggling to get hold of one -so made up my mind to came up with a more practical solution, and here it is!


THE MAIN WORKS
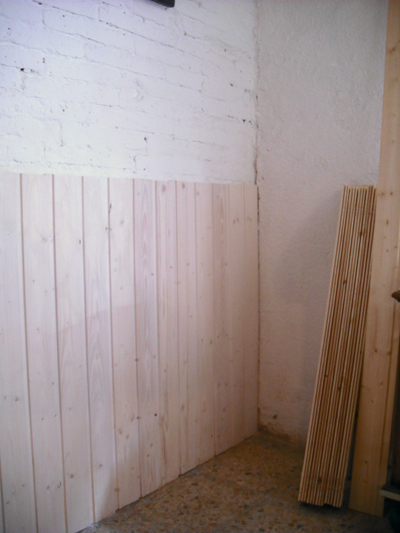
The ultimate reason to take on this renovation was the humidity in those brick walls: no matter how many times I'd apply a waterproof coat, the paint on top would eventually crack and sprinkle the furniture with white dust...that's what comes from not
I didn't want to loose the exposed brick, so I ended up panelling the lower part of those walls with pinewood slats, only higher in the worst side.


THE NEW PLATFORM FOR THE SMALL WINDOW DISPLAY AREA:
I got myself a few gorgeous old pinewood floorboards in MINT condition, salvaged from a flat renovation (who could want to replace these beauties? and what have they installed at their place? I don't want to know, really. Too bad for that people, I was so happy to spare these pieces of wood a criminal landfield ending and give them a new, glamorous second chance!)
The space to cover -like any other area in the workshop- is not even, so here I was calculating how to fit the boards. Once cut, I gave them a proper sanding


Vale, definitivamente quiero a venir a "jugar" contigo!
ReplyDelete