Showing posts with label collage. Show all posts

1Unik's New Shop -The Wall Tree

The Wall Tree
Remember the 'Trash Tree' that I built three years ago in the old place? I enjoyed it so much -plus it became a kind of a trade mark- that I didn't even think twice about building a second version for Parlament Street. Up for some details?

Made out with over a hundred pieces of scrap wood and almost 3 meters high, it includes two shelves in its branches for displaying some of 1Unik's production. I also built it around some wire pipes that happened to be in that area of the wall (not easy!) and integrated the light plug in the lower part of the trunk.
Even though it's made out of salvaged pieces of wood from varied origins, I've tried to balance the different tones and create a toned-down palette in light browns, whites and grays to match the rest of the decoration. Your turn to judge if the goal is been achieved!

Some pics taken during the two-day building process:


And some views in detail of the complex scrap wood collage:

Flat Decoration Project... for a TV show!

Yuhuuu, 1Unik's decoration project in a flat in Barcelona, mostly using our upcycled elements and some custom made pieces, has been featured in the local Tv Channel! Here is the description of the intervention on each room, plus the video of the program and even a 'behind the scenes' chapter. A monster-post! I hope it loads fine...

THE LIVINGROOM: I worked on this some time ago, it was an interesting task to undertake and there are plenty of details to it! You can check the previous posts on the whole project , and the detailed description plus the making of the Dj Deck Stand, the Red Pallet Coffe Table, the Storage Stool on wheels, the TV Bench and the Personalised Collage.

THE KITCHEN: I didn't intervene here, but the bold use of red in it was a starting point to decorate the living room, as the two rooms are 'linked' by a door and a window.

THE BEDROOM: or -How to decorate a whole room in a day! Once again, using just a few elements, loads of imagination and some upcycled items. Just as the kitchen and the living room are vibrant, full of energy, here I wanted to create a soothing, calm atmosphere. Almost bare walls, not too much furniture, a low bed and a range of 'earthy' colours (browns, tans, greens, burgundy red and a touch of soft blue) achieved by the use of wood and other natural materials, a plant, plus houseware and lamps with those tones.
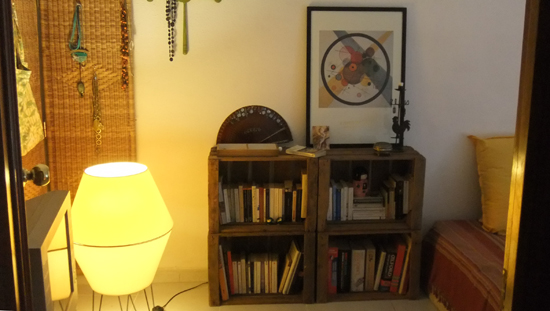
These old wooden fruit crates were used for shelving, storage and even a tv stand: pretty straight forward -practical and effective! The green mirror frame is not what it seems... you can discover more about it here.
Check the post on the Strippy Chair for full details and the making process of this piece. The transformation of the cute old clothes hanger into a wall hanger to display necklaces can be found here.
That floor lamp with a 'Mid-Century Danish look' is made out of two lamp shades from the late 70s and a vintage flower pot stand, painted black. Not only it looks good, but it gives a lovely soft light, perfect for a bedroom. The whicker folding screen 'warms up' that corner of the room, provides instant decoration, serves as the background for the floor lamp and can be used for storage as well: simply dangling bags, jewelry, sun glasses and so on from hooks.
The lamp used on the bedside table that casts stricking shadows is called The Wasp Lamp, and the jewelry tray is made out of an old tools drawer. Posts on these ones in detail here and here.

THE TERRACE: As Bea, the TV presenter, put it "the real treasure of the place". Not much to do here, just some rearrangement of the space and the plants, creating a corner for the barbecue at the back, and a cozy sitting area next to a rustic display of some plant pots using an old wooden wire spool as an auxiliary table.

THE TV REVIEW
And here is the full TV review as it appeared in Connexió Barcelona program:

(Click here if you cannot see it directly in this post)

BEHIND THE SCENES: A few pics and a short video taken during the 'making of'... thanks a lot to the fabulous assistant! I couldn't have done it whithout such valuable help -plus would have appeared even more shy without the moral encouragement, euhh- And tons of thanks to the flat owner, Bea from Barcelona Televisió & her team, your support and interest really push me to keep going :)

Personalised Collage

It had been a long time I hadn't made a collage; this one was real fun! It is a rather large one (100x 40cm), made for a dj with cuttings from selected record sleeves of albums that she loves, a 'punk' feel -but loosely structured nevertheless- and following the colour scheme of her living room (see the decoration project of that room here)

Here are some pictures in detail:

Upcycled DJ Deck Stand


This was the main element in the living room decoration project from this January. The comissioner is a musician that also mixes records, and even though she already had homemade wooden boxes to keep her vinyl collection, she needed a proper stucture to rest the decks, mixing table and (eventually) the computer.
What everyone does here in Barcelona when searching for a deck stand on a small budget is to get Ikea's Expedit shelving. An action absolutely out of the question with this project, because of many reasons: firstly, when furniture is not made to measure it probably won't fit. In this case, 'fitting' was key: small space, loads of records, specific heigth needed for 'healthy' djing, etc. Then, why throwing away something that is still in perfect use? not only money-saving-wise, but thinking that those lovely plywood boxes were going to be replaced by a totally impersonal plastic thing gives me the creeps -beurk.

So I measured the space, the boxes, the decks, searched for usable pieces and boards that were already around in the flat to keep the budget to the minimum... and started playing Tetris with all the elements till a proper design showed up in the plan. And then of course had to modify that plan as I builded the whole thing up and uneven walls plus strange forces appeared, like always happens.


L shape provided the best use of space, and there is even enough room to add more boxes in the wall behind and form a 'U', when the record collection increases with the time. The hight is the exact the dj needs and all the wood and warm colours add a 'cozy' feeling to that area.

Reusing boards means more planning but also to spend some time getting screws and other parts out, and even refilling the holes! I made a paste with sawdust and a special glue that solidifies like a rock.. I think it will last for a long time!
I also made a hole in the surface, big enough to get all the cables and plugs through, down to the socket.


It might be made out of reused materials, but this Dj Deck Stand is high class! It even has a wooden brim to keep the cables and rear parts of the machines out of sight, just like the 'professional' ones -I love to make details like that.. and found a cute metallic lizard that was forgotten among a mess of stuff, that now peeps over the brim to check the decks. It has become the Dj's pet *wink*


(see the basket with the smaller records? that's another find of a hidden 'treasure' in the house... looks much better like that than the shoe box that was used before!)


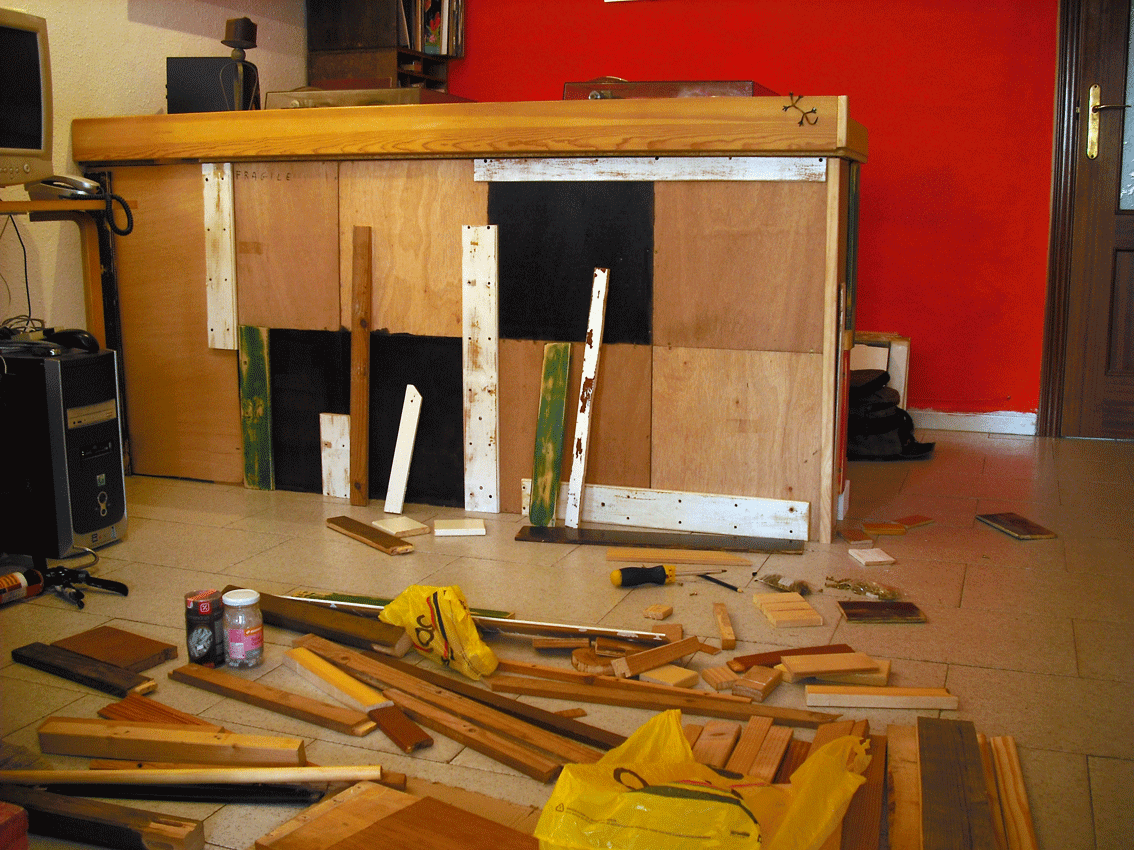
To strengthen the whole structure and at the same time to continue with the 'mix' that was the result of reusing different elements to build the deck stand, I decided to decorate the front part with a 'collage' made out of scrap wood, similar to the Trash Tree idea, but more colourful and with a lineal display (to blend in with the warm modern look of the rest of the room). This was of course my favourite part!
Making the woden collage implies gathering a massive amount of scrap boards. And in order to get the stressed look in some of them they have to be painted, sometimes with different layers of colours, then sand them carefully here and there to show up the underneath.. I find that cracked look incredibly attractive!.

Afterwards it comes the design of the lay out. Cutting the pieces of board to fit, arranging the volumes, textures and colours harmoniously.. and in this case being extremelly careful trying to attach the main pieces of wood to the thicker brims of the boxes, to avoid getting the screws through the thin plywood background.
 A big amount of work, yes -but oh so rewarding! I got not only my pleasure creating this, but also the glee of the owner when she saw the result. That's always a huge reward!